
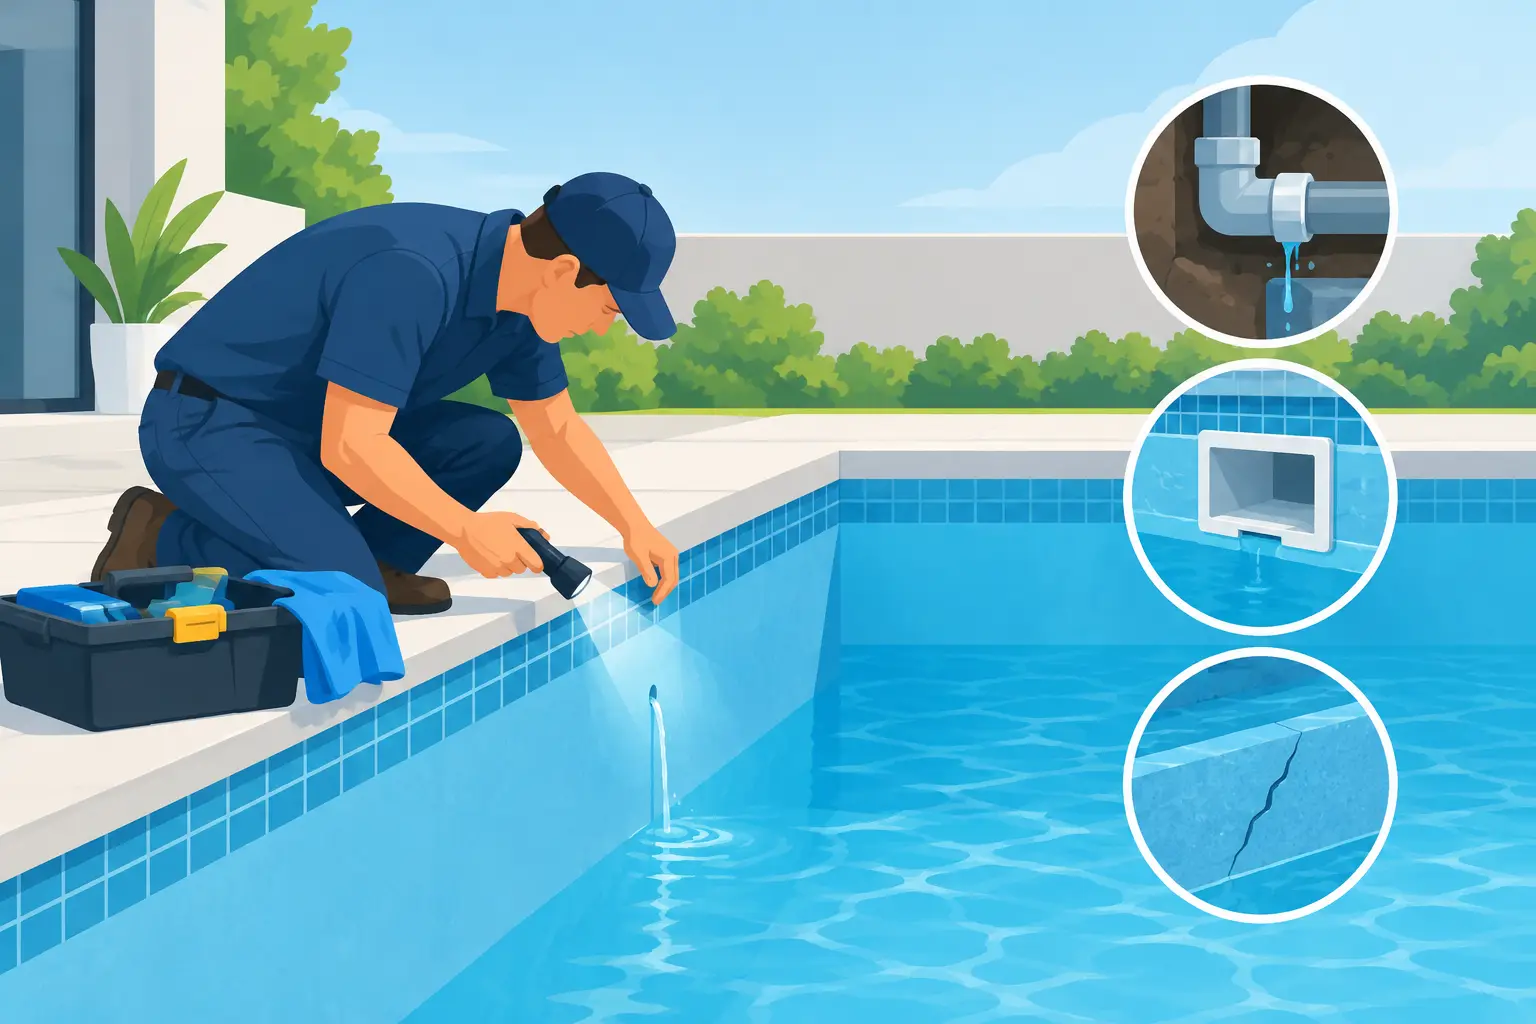
A falling pool level is not just an irritation on a hot Cyprus afternoon. It can waste treated water, destabilise chemical balance, increase pump running costs and, if the fault is near electrical equipment or underground pipework, develop into a more serious repair. Knowing how to repair pool leaks starts with identifying exactly where the water is leaving – not applying sealant to the first crack you see.
For villa owners, landlords and communal-pool managers, the priority is to protect clean, healthy and safe operation while preventing avoidable damage to the pool structure and plant room. A leak diagnosis should be methodical, particularly after extreme summer heat, heavy rain or a period of intensive use.
First, confirm that it is a leak
Evaporation can be substantial during a Cyprus summer, especially where a pool is exposed to direct sun, wind and high water temperatures. Splash-out from families or holiday guests can also make water loss look more dramatic than it is. However, a pool that needs frequent top-ups, has a persistent wet patch around the shell, or loses water more quickly when equipment runs is signalling a fault worth investigating.
The bucket test is a useful first check. Fill a bucket with pool water and place it on a pool step so the water inside the bucket sits at approximately the same level as the pool water outside. Mark both levels, then leave the circulation system off for 24 hours. If the pool level falls noticeably more than the bucket level, there is likely to be a leak rather than normal evaporation.
Repeat the test with the pump running. Greater water loss while the system operates often points towards a pressure-side leak, such as pipework after the pump, a return fitting, a heater connection or equipment in the plant room. If the loss slows or stops when the pump runs, the suction line before the pump may be drawing air instead.
Locate the source before attempting a repair
A reliable diagnosis separates leaks into three broad areas: the pool shell and fittings, visible equipment and concealed plumbing. Each needs a different repair method.
Inspect the plant room and visible pipework
Start at the pump, filter, valves, chlorinator, heater and any booster or water-feature equipment. Look for drips, white mineral deposits, damp unions, corroded clamps and staining beneath equipment. A tiny leak at a pump lid O-ring or multiport valve can lose a surprising amount of water over a week.
Check the filter waste line as well. A faulty multiport valve or worn spider gasket can allow water to pass continually to waste, even when the valve is set to filter. This is sometimes mistaken for an underground leak because there may be no visible water around the pool.
Do not tighten fittings aggressively. Overtightening plastic unions can crack them, while a worn O-ring will not become watertight simply because the lid is forced down. Isolate the equipment, release pressure safely and inspect the relevant seal. Replace distorted, brittle or flattened seals rather than reusing them.
Examine fittings, lights and the waterline
With circulation switched off, inspect skimmer throats, return inlets, vacuum points, main-drain fittings and the joint around underwater lights. Dye testing can help. Using a small syringe or dye tester, release a little coloured dye close to a suspected area without disturbing the water. If the dye is drawn into a crack, fitting or conduit, it indicates water movement towards the leak.
Pool lights require particular caution. Never dismantle an underwater light fitting while it is energised, and do not treat a leaking niche as a simple cosmetic job. Water can travel through a damaged light conduit towards electrical connections. Isolate power at the appropriate circuit before inspection and arrange a qualified pool engineer or electrician where there is any doubt.
A falling water level can also offer a useful clue. If water loss stops at the bottom of the skimmer, inspect the skimmer body and its connection to the suction pipe. If it stops at the return inlets or light fitting, concentrate on components at that height. This is not conclusive, but it narrows the investigation.
Check the shell, grout and liner carefully
Hairline cracks in render, tile grout or coping do not always mean the pool shell is leaking. Some are surface movement or finish defects. Equally, a crack that looks minor can allow water behind the finish, where it may undermine adhesive, damage surrounding ground and worsen over time.
For tiled or rendered pools, inspect cracks with the pool level held steady where possible. Repairs may involve removing unsound material, preparing the substrate and using a compatible waterproof repair system before reinstating tiles or finish. Smearing standard filler across a wet crack is rarely durable, particularly under constant immersion and thermal movement.
For liner pools, look for small punctures, separated seams and damage around fittings. A patch can be effective when the liner is otherwise sound and the damaged area is accessible. The correct underwater repair material matters, as does cleaning the patch area and allowing sufficient overlap. A liner that has become brittle, heavily stained or repeatedly repaired may need more than a patch; replacement can be the safer long-term decision.
How to repair pool leaks in pipework
Visible pipework faults are often the most straightforward repairs. Once the relevant line is isolated and drained, a damaged union, valve, pressure gauge, pipe section or fitting can be replaced with components suited to the existing system. The replacement must be properly aligned and supported. Pipework under strain tends to fail again at the next weak joint.
Concealed plumbing is different. Avoid excavating based on guesswork. Professional leak detection may involve pressure testing individual suction and return lines, electronic listening equipment, tracer gas or camera inspection where access permits. This identifies the failed line and reduces unnecessary disturbance to paving, landscaping or the pool surround.
There are occasions when a pipe can be repaired locally, and others where a section should be rerouted. The right choice depends on the pipe material, access, the location of the break and whether the original line has failed through age, ground movement or poor installation. A cheap local repair is poor value if the surrounding pipework is already compromised.
Protect water quality while the pool is under repair
Do not assume a leak is separate from water hygiene. Topping up with fresh water changes the chemical balance and can dilute disinfectant, stabiliser and salt concentration. A leak also permits contaminants to enter areas behind liners, within fittings or around damaged pipework.
Before restarting normal use, test and correct pH, sanitiser level, alkalinity and, where relevant, salt concentration. Run the circulation system long enough to restore complete turnover, then confirm the filter pressure and flow are normal. If a repair has involved render, grout, adhesive or sealant, follow the product curing instructions before exposing it to full chemical treatment or bathing loads.
For communal and commercial pools, record the fault, corrective action and post-repair water test results. This supports responsible operation in line with the risk-management principles behind EN 15288-1 and EN 15288-2. It also provides property managers with a clear maintenance history if the problem reappears.
When a professional repair is the sensible choice
A homeowner can often replace a pump lid seal or apply a small liner patch. Escalate the work when there is unexplained water loss, buried pipework, damage near electrical components, recurring cracks, structural movement or water entering the plant room. These are not jobs to postpone until the next maintenance visit.
The Pool People can investigate leak symptoms alongside the wider condition of the circulation and treatment system. That matters because a repair is only successful when the pool returns to stable water levels, dependable filtration and safe water quality – not merely when a visible drip disappears.
Reduce the chance of another leak
Most leaks give early warnings: a pump that draws air, a pressure reading that changes unexpectedly, loose tiles, recurring dampness or a water bill that no longer matches normal use. Include these checks in routine maintenance, especially before the heavy-use season and after winter storms.
Keep the water level within the recommended operating range, maintain balanced water chemistry and address failing seals before they harden in the heat. A carefully diagnosed repair protects more than water. It protects the structure, equipment and the confidence that every swimmer is entering a properly managed pool.


Leave A Comment